Idli is a savory rice cake and a delicious breakfast staple of South India. It is made with a mixture of rice and urad dal (a type of lentil), which is ground into a batter and fermented overnight. The next day, the batter is steamed into fluffy little cakes - idlis! In this blog post we talk all about Idli - how to make soft idli and dosa batter?
These savory treats are usually enjoyed with coconut chutney, tomato chutney, sambar, or other condiments. Yum! Try making some idlis for a yummy and nutritious start to the day. You won't regret it!
Idlis are an integral part of the Indian culinary landscape, especially in South India. Not only are they a staple for breakfast, but they're also incredibly nutritious! Low in fat and high in carbohydrates and protein, idlis make for a healthy start to the day. But that's not all - these savory steam cakes are also popular during festivals and special occasions.
Origin of Idli
While idli is commonly believed to have originated in southern India, there is some evidence to suggest that it may have actually originated in Indonesia. Historian K T Achaya has suggested that the dish may have been brought to India by Indonesian Hindu cooks and traders who traveled to the region for trade and commerce.
According to Achaya, the Indonesian dish called "kedli" or "keddli" is similar in preparation and appearance to idli. Kedli is made from a mixture of rice and black gram that is fermented before steaming, much like the process used to make idli.
Achaya suggests that this dish may have been brought to India by Indian cooks working in the royal kitchens of the then-Indonesian rulers and adapted over time to become the idli we know today.
Why should you make them?
Idlis offer several health benefits, including:
- Nutritious: Idlis are made from a mixture of rice and urad dal, which are both excellent sources of carbohydrates and protein. They are also low in fat and calories, making them a healthy breakfast option.
- Easy to digest: The fermentation process used to make idli batter helps to break down the complex carbohydrates in the rice and dal, making them easier to digest. Also, they are easily digestible because they are steam cooked instead of fry or sauteed.
- Gluten-free: Idlis are naturally gluten-free, making them a great option for those with gluten intolerance or celiac disease.
- Low glycemic index: The combination of rice and dal used in idlis has a low glycemic index, which means that they release glucose into the bloodstream slowly and steadily, keeping blood sugar levels stable.
- Rich in nutrients: The fermentation process used to make idli batter increases the bioavailability of certain nutrients, including B vitamins and minerals like iron and zinc. Since they are fermented overnight, they are a great source of probiotics as well.
Other benefits:
They make an easy weeknight dinner or early morning breakfast. The fermented batter stays good in the freezer for up to 4 days.
Idli is a versatile breakfast or dinner menu option because it can be customized with a variety of toppings like coconut chutney and condiments to suit individual tastes.
Methods of making Idli Recipe:
There are two main methods for making idli recipe: one involves using whole idli rice and the other involves using idli rava.
Traditional Method using Idli rice:
The traditional method of making idli involves soaking whole idli rice and urad dal separately, grinding them separately, and then mixing the two batters together. The rice and lentil batter is then fermented overnight before steaming idli in molds. This method is more time-consuming but results in a smoother batter and softer idlis.
Alternative method using idli rava:
The second method involves using idli rava, which is pre-soaked and then mixed with a ground urad dal batter. This method is quicker and easier than the traditional method, but the idlis may be slightly less smooth in texture.
Both methods using rice or idli rava can produce delicious idlis, and the choice ultimately comes down to personal preference and convenience.
How to make Idli using Idli rava ?
Idli rava is a popular alternative to using rice when making idlis. Idli rava is made from coarsely ground rice that has been parboiled, which makes it easier to prepare than using whole rice grains. Here is a step-by-step guide for making idlis with idli rava:
Ingredients:
- 2 cups idli rava
- 1 cup urad dal
- 1 teaspoon fenugreek seeds
- Water, as needed
- Salt, to taste
Instructions:
- Rinse the urad dal and fenugreek seeds in water and soak in enough water for 4-6 hours.
- Rinse the idli rava in water and soak it in enough water for 4-6 hours as well.
- Drain the soaked urad dal and fenugreek seeds and grind them in a wet grinder or a high-speed blender. Add water as needed to make a smooth and fluffy batter.
- Transfer the batter to a large mixing bowl.
- Drain the soaked idli rava and mix it with the urad dal batter. Add salt to taste and mix well.
- Cover the bowl and set aside in a warm place to ferment for 8-12 hours or overnight.
- After fermentation, the batter will have risen and become fluffy. Mix the batter well.
- Grease the idli molds with oil or ghee and fill each mold with the batter.
- Steam the idlis in an idli cooker or a steamer for 10-15 minutes or until a toothpick inserted into the center of the idli comes out clean.
- Allow the idlis to cool for a few minutes before removing them from the molds using a spoon or knife.
Your idlis made with idli rava are now ready to serve with chutney and sambar.
Major Ingredients for Homemade Idli batter
- Idli rice/ Parboiled rice
- Whole urad dal (skinned black lentils)
- Fenugreek seeds/methi seeds(optional)
- Salt to taste
- Ice cold water as needed for grinding
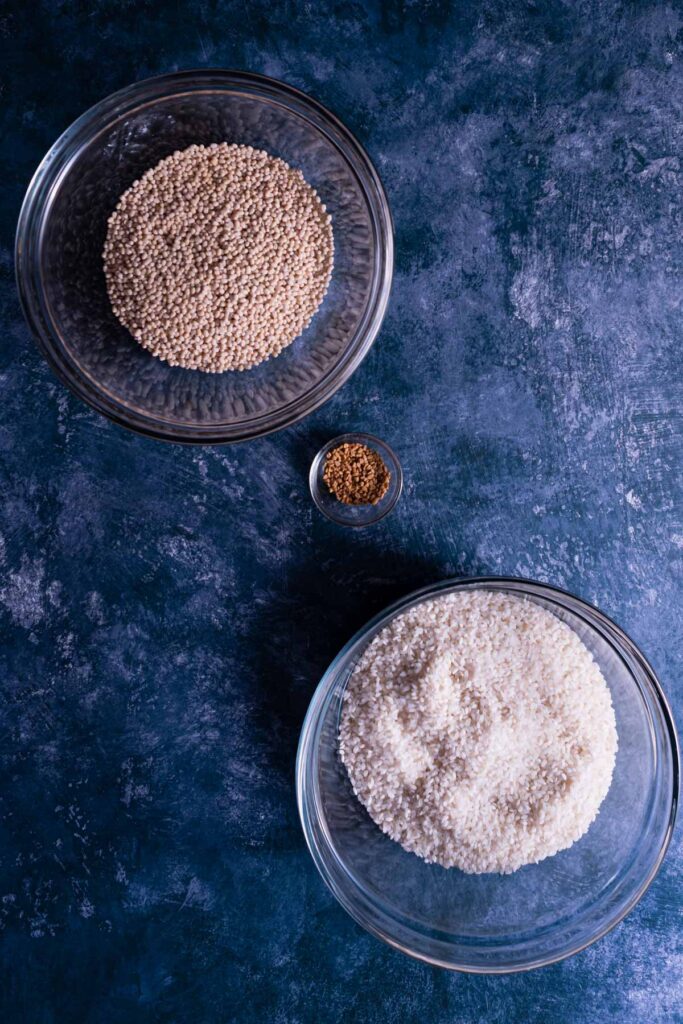
Step-by-step instructions to make Idli Dosa Batter
Measuring and Soaking:
- Rinse 3.5 cups of idli rice (parboiled rice) and 1 cup urad dal (and 1 teaspoon fenugreek seeds/ methi seeds, if using) separately under running water.
- To make idli batter, soak rice and urad dal separately in enough water for 4-6 hours or overnight. The water level should be at least a couple of inches above the rice and lentils.
Grinding the batter
- After soaking, drain the water from the urad dal (and fenugreek seeds/ methi seeds, if using) and grind it in a wet grinder until it becomes a soft fluffy batter. Pour the urad dal batter into a large bowl.
- Next, grind the rice until it is fairly smooth. The ground rice texture should not be too smooth nor too coarse. Again, add water as needed. Pour the coarsely ground idli rice into the same bowl as the lentil batter.
- Add salt to the idli batter and mix well.
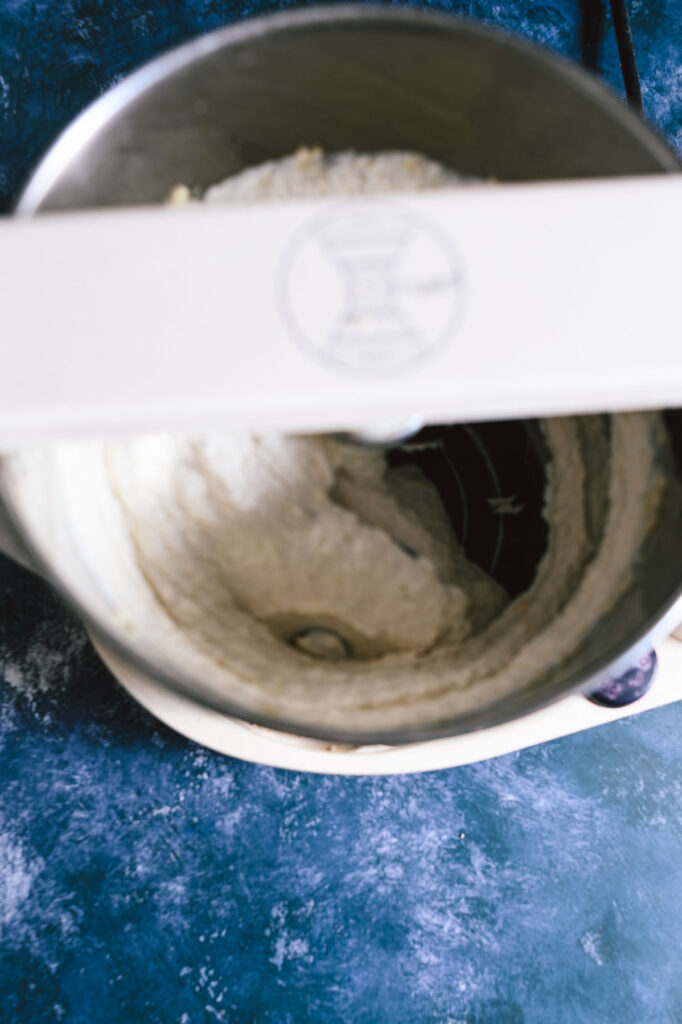
Fermenting:
- Cover the idli batter bowl with a lid or a plate and let it ferment for 8-10 hours or overnight. The fermentation process is essential to give the idli its characteristic soft and fluffy texture.
- After fermentation, the idli batter will have risen and become lighter in texture. Stir the batter well to combine any separated liquids.
How to make Idli with Fermented Idli batter?
- Grease the idli moulds with some oil or ghee to prevent sticking.
- Bring water to a boil in a steamer or a pressure cooker or an idli cooker.
- Using a ladle or a small cup, pour the fermented idli batter into the molds, filling each mold about ¾th full.
- Place the idli mold inside the steamer or pot and cover it with a lid. Make sure the lid is tight-fitting to prevent steam from escaping.
- Steam the idlis for about 6-8 minutes on medium heat, or until a toothpick inserted in the center of the idli comes out clean.
- Turn off the heat and take out the idli mold from the idli steamer. Sprinkle a little cold water and let the idlis sit in the mold for a few minutes to cool down.
- Use a spoon or a knife to remove the idlis from the molds. They should come out easily if the molds were greased well.
- Repeat the process until you make the required amount of idlis.
Pro Tips and Tricks for a soft idli batter recipe
- Use a wet Grinder: I highly recommend a wet grinder to make the fluffy and soft idli batter as it churns out a smooth and fluffy consistency. The open structure of the wet grinder lets in a lot of air into the ground batter, thus making it light and fluffy.
- Grind the urad dal first: Grind the soaked urad dal in the wet grinder first and not the soaked idli rice.
- Do not add a lot of water to the urad dal in one go while grinding as it may not help with the thorough grinding of the dal.
- Time for grinding: Grind the urad dal for about 45 mins - 1 hour and rice for 25 mins. Grind the urad dal into an extremely smooth and fluffy batter. A good indication of doneness is that the finished batter should float in water.
- Use ice-cold water for grinding: I recommend using ice-cold water for grinding because it will help cool off the heat from the wet grinder machine.
- Mix lentil and rice batter thoroughly: When mixing the rice and lentils ratio, mix both the urad dal batter and rice batter thoroughly with your hand before fermenting. Only a fully blended, well-mixed batter yields the best results when fermented.
- If using mixie: If you do not have a wet grinder and still want to make idlis do not fret. When using blender/ mixie for grinding the rice and lentils, change up the ratio of rice and lentils to 2.5 : 1. In other words, use 2.5 cups of dal for every 1 cup of urad dal.
- Pour batter into a large bowl: Ensure that you are pouring the urad dal batter and rice batter into a large enough idli batter bowl that leaves space for the batter to rise during fermentation.
- Before pouring into idli molds: Mix the idli/ dosa batter thoroughly and gently taking care to not rid the batter of its aeration. This is to ensure that the rice batter being heavier than urad dal batter(airy and fluffy). tends to sink to the bottom.
- Consistency of batter: For making idlis, the idli batter should neither be too runny nor too thick. It should have a pourable consistency while still thicker and aerated. However, for dosas, the batter should be a little runnier and spreadable.
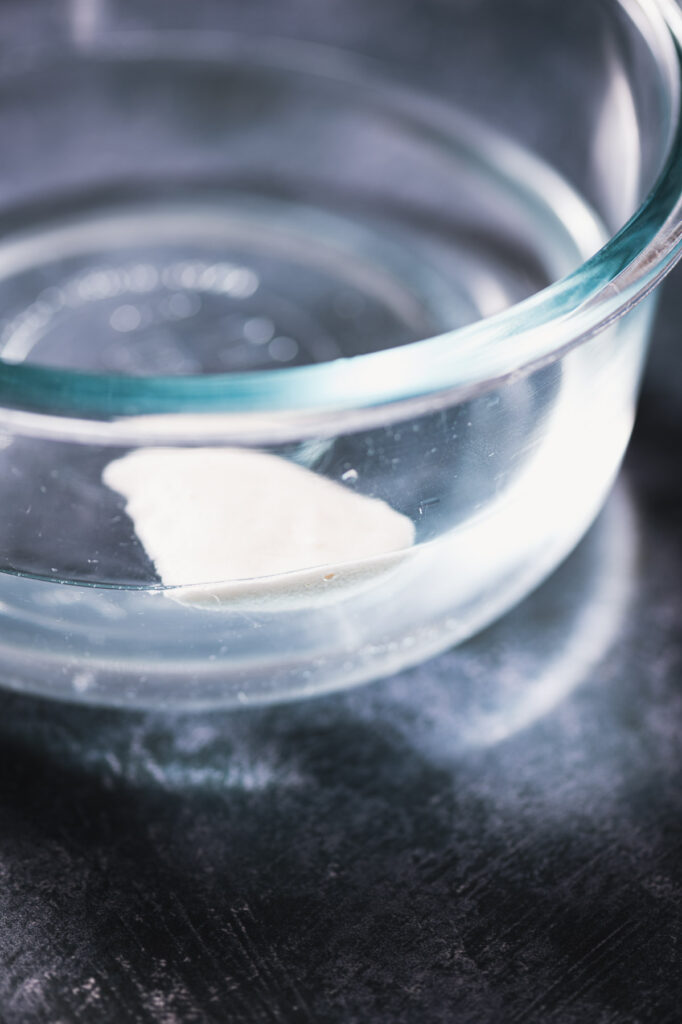
Suggestions for a perfectly fermented idli batter recipe:
Use good quality ingredients: The quality of the rice and urad dal used in making the batter is crucial for fermentation. Make sure to use fresh, good-quality rice and dal, and store them in an airtight container to keep them fresh.
Grind the batter to a smooth consistency: Grinding the rice and dal to a smooth, fine consistency is important for proper fermentation. Use a wet grinder or a high-speed blender to grind the batter until it is smooth and fluffy. If the batter is too coarse, it may not ferment properly.
Add a fermentation booster: Adding a fermentation booster like fenugreek seeds or poha (flattened rice) or perhaps even cooked rice can help speed up the fermentation process and make soft idlis. Soak a teaspoon of fenugreek seeds or a handful of poha along with the rice and dal before grinding.You can also add a teaspoon of previously fermented batter to the freshly ground batter.
Keep the batter in a warm place: The ideal temperature for fermentation is around 80 to 86 degrees Fahrenheit. If the weather is cold, keep the batter in a warm place like an oven with the light on, or use a insulation box or a warm water bath to keep the batter warm. You can alternatively use an instant pot for fermenting dosa batter.
Do not disturb the batter while it is fermenting: Once the batter is mixed and kept for fermentation, avoid disturbing it too much as this may interfere with the fermentation process. Cover the bowl with a lid or a plate, and let it ferment undisturbed for 8-10 hours.
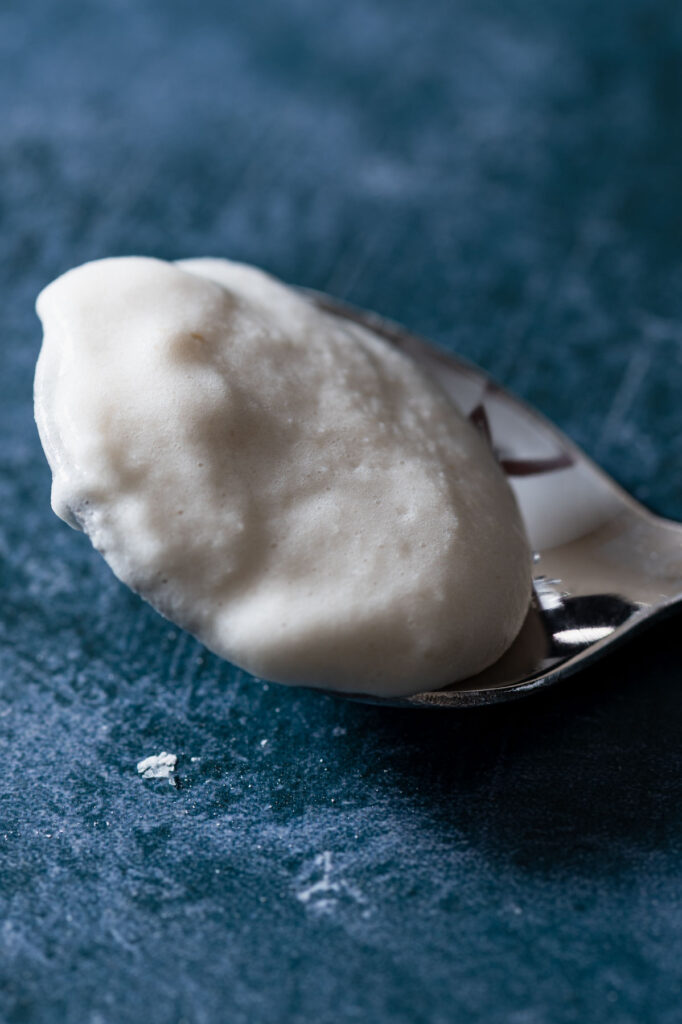
Fermenting idli batter in an Instant Pot using the Yogurt Maker function
Fermenting in an instant pot is a convenient and easy method. Here are the steps to follow:
- Prepare the idli batter as per the recipe and transfer it to the Instant Pot inner pot.
- Cover the pot with the instant pot lid or a plate and select the Yogurt function on the Instant Pot.
- Use the Adjust button to set the fermentation time to 8-10 hours. You can adjust the time based on the temperature in your kitchen and the consistency of the batter.
- Make sure the venting knob is in the "Sealing" position and press the Start button to begin the fermentation process.
- After 8-10 hours, open the Instant Pot and check the batter. It should be fermented and fluffy with a sour aroma. If the batter is not fermented enough, you can extend the fermentation time by a couple of hours.
- Remove the inner pot from the Instant Pot and transfer the batter to a container bowl.
- Mix the batter well with a spoon or spatula to remove any lumps or air pockets.
Your fermented idli batter is now ready to be steamed and turned into delicious fluffy idlis.
Troubleshooting:
Idlis are not soft or fluffy: It could mean that the batter was not fermented well as it is the fermentation process that gives an aerated structure to the idli. The fermented idlis have a characteristic sour smell.
Idlis are deflated and not fluffy: It means that the idli batter contains a larger proportion of urad dal. Try reducing the amount of urad dal. Sometimes, due to the quality and nature of the ingredients, we may need to alter our ratio to make fluffy batter.
The idlis are hard or dense: If the idlis turn out hard or dense, it could be because the batter is too thick, the steaming time is too long, or the water in the steamer is not boiling enough. Also, in order to make soft idlis, make sure the batter is thin enough to pour easily.
The idlis stick to the molds: If the idlis stick to the molds, it could be because the molds are not greased properly, or they were scooped out when the idlis were still very hot. To prevent sticking, make sure to grease the molds with a little oil or cooking spray before pouring the batter.
The idlis have a sour or bitter taste: If the idlis have a sour or bitter taste, it could be because the batter has fermented for too long or has gone bad. To prevent this, make sure to ferment the batter for only 8-10 hours, and store it in a cool place. If the fermented batter smells off or has a strange color, discard it and start with fresh ingredients.
How to serve idlis?
- Sambar
- Coconut Chutney
- Tomato Chutney
- Peanut Chutney
- Onion Chutney
- Idli Podi
- Mint Chutney
Other dishes can you prepare with idli/ leftover idli?
- Idli upma
- Masala Idli / Fry Idli
Storage instructions for idli
To store freshly made idlis, allow them to cool for a couple of minutes before transferring them to a thermo casserole.
If you have leftover idlis, they can be stored in the refrigerator or freezer. To store in the refrigerator, wrap the idlis in plastic wrap or aluminum foil and place in an airtight container. They can be stored in the refrigerator for up to 2-3 days.
To store in the freezer, wrap the idlis in plastic wrap or aluminum foil and place them in a freezer-safe container. They can be stored in the freezer for up to 1-2 months.
It's important to note that leftover idlis may become slightly dry or hard, but they can still be enjoyed as idli upma or idli fry.
FAQS
Idlis can be a good food option for weight loss for several reasons:
Low in calories: One plain idli contains only around 40-50 calories, making it a great choice for those looking to lose weight or maintain a healthy weight. The low-calorie content of idlis makes them an ideal addition to any weight loss diet.
High in protein and fiber: Idli is a great source of both protein and fiber thanks to its combination of rice and urad dal. This makes them a satisfying breakfast that will help keep you feeling full for longer periods, making them an ideal choice for weight-loss diets.
Low glycemic index: Idli has a low glycemic index, meaning that they are slowly digested and do not cause sudden spikes in blood sugar levels. This can help regulate hunger, allowing you to feel fuller for longer periods and preventing overeating.
Easy to digest: The fermentation process used in making idli, breaks down the complex starches and proteins, making them easier to digest and absorb which helps regulate hunger.
When it comes to weight loss, it is essential to remember that the total calorie and nutrient intake of your meals throughout the day will be the biggest deciding factor.
Healthy choices such as including idlis in your diet can certainly help you on your journey, but making sure you are eating a balanced diet is key!
When incorporating idlis into your diet, it's important to remember to have them in moderation and as part of a balanced diet. Toppings such as coconut chutney or ghee should be avoided as they can add high amounts of fat and calories to the meal.
Eating mindfully and following a healthy eating plan with plenty of fruits, vegetables, lean proteins, and whole grains is the best way to ensure successful weight loss.
Idlis have a mild and slightly tart taste, thanks to the fermentation process. Overall, however the idli tastes bland.
So, they can be enjoyed as is or can be paired with savory accompaniments such as sambar or chutney for added flavor and spice.
The flavor of idlis can vary depending on the ratio of rice and urad dal used in the batter, as well as the fermentation time and temperature.
Generally, they have a mild flavor that is balanced by a slight tanginess from the fermentation process
Choosing the right urad dal for urad dal batter is important to ensure the best quality and texture of the idli batter resulting in soft idlis. Here are some tips for selecting the right urad dal:
Look for whole, unpolished urad dal: When selecting urad dal for making urad dal batter, it is best to go for the whole, husked, unpolished variety. This type of dal retains more of its nutrients and flavor than polished or split dal, resulting in a more flavorful and nutritious final product.
Choose high-quality dal: When selecting urad dal for making lentil batter, opt for high-quality options that are clean and free from impurities. The dal should have a uniform size and color, without discoloration or musty odors. This is an indication of freshness and quality, which will result in better-tasting idlis.
Check the packaging date: When purchasing urad dal for making lentil batter/ urad dal batter, it's important to check the packaging date to make sure it is fresh. Opt for dal with a more recent packing date and look for a bright color and pleasant aroma, which will indicate that the dal is of good quality and has been recently packaged.
Choose the right variety of urad dal: There are two main varieties of urad dal to choose from: black and white. Black urad dal is considered the more traditional choice as it has been used for centuries in India to make idlis. However, these days almost every household only uses the white urad dal for its milder flavor and appealing color.
For the best idli batter, it is important to choose the right type of rice to ensure the best texture and flavor of the idlis. The most common type of rice used for making idli is parboiled rice (also known as idli rice).
Parboiled rice is a variety of rice that has been partially cooked and then dried to make it easier to grind into a fine batter. Idli rice is specifically grown for making idlis and is widely available in India and other countries, with its short, fat grain producing a soft and fluffy texture. This type of rice surpasses regular parboiled rice when it comes to making idlis.
Regular raw rice can also be used to make idli batter/ dosa batter, however, it does not yield the same soft fluffy texture that we get when using parboiled rice.
Another alternative to idli rice/ parboiled rice is the sona masoori. They yield much better results when making the idli batter/ dosa batter.
Ultimately, the type of rice you choose for making idli will depend on your personal preferences and availability. If you can find idli rice, it is the preferred choice for making idli batter, but regular raw rice can also be used with good results
No. Basmati rice, which is a long-grain rice commonly used in Indian cuisine, is not recommended for making idli batter as it will not produce the desired soft and fluffy texture. Basmati rice is better suited for recipes that need to bring out the flavor and the aroma of the rice itself like biriyani or pulav.
Yes. However, the batter for dosa needs to be typically thinner in consistency than the idli batter, as it needs to spread easily on the griddle. Also, the batter for dosas needs to be a little more sour than the freshly fermented batter that is used for making idli. Hence, I make idlis exclusively for the first couple of days of the freshly fermented batter.
One cup of idli rice is 220 grams and one cup of urad dal is 205 grams. So for the ratio of 3.5: 1,
we need 770 grams of idli rice and 205 grams of urad dal. The fermented idli batter usually lasts for 4 days of either dinner or breakfast for my 4 member family.
Idli - How to make soft idli and dosa batter?
- Total Time: 10 hours
Description
In this blog post we talk all about Idli - how to make soft idli and dosa batter, the proportions for making batter and pro tips and tricks to make the recipe. Idli is a savory rice cake and a delicious breakfast staple of South India. It is made with a mixture of rice and urad dal (a type of lentil), which is ground into a batter and fermented overnight. The next day, the batter is steamed into fluffy little cakes - idlis!
Ingredients
3.5 cups Idli Rice / Parboiled rice
1 cup Whole Urad dal lentils
1 teaspoon Fenugreek/ Methi seeds
4 teaspoons salt
Instructions
- Rinse 3.5 cups of idli rice (parboiled rice) and 1 cup urad dal (and 1 teaspoon fenugreek seeds/ methi seeds, if using) separately under running water.
- To make idli batter, soak rice and urad dal separately in enough water for 4-6 hours or overnight. The water level should be at least a couple of inches above the rice and lentils.
- After soaking, drain the water from the urad dal (and fenugreek seeds/ methi seeds, if using) and grind it in a wet grinder until it becomes a soft fluffy batter. Pour the urad dal batter into a large bowl.
- Next, grind the rice until it is fairly coarse. The ground rice texture should not be too smooth nor too coarse. Again, add water as needed. Pour the coarsely ground idli rice into the same bowl as the lentil batter.
- Add salt to the idli batter and mix well.
Notes
Always grind the soaked urad dal lentils until extremely smooth and fluffy taking care to add water little by little as the grinding progresses.
Grind the soaked rice until it reaches a slightly coarse texture.
You may include soaked poha while grinding the batter.
Mix both the batters thoroughly with before allowing it to ferment.
- Prep Time: 8.5 hours
- Cook Time: 1.5 hours
- Cuisine: Indian

Comments
No Comments